By Christina Heiser
Gluten-free baking isn’t just a flash-in-the-pan trend. It’s an essential part of many people’s lives for a variety of reasons. Whether you have celiac disease like I do, non-celiac gluten sensitivity, a wheat allergy, or a personal preference for avoiding gluten, chances are you still want to be able to enjoy your favorite sweet treats this time of year—sans gluten.
But gluten-free baking can be intimidating if it’s new to you or you’ve experienced gluten-free baking fails along the way like I have. After all, gluten is a protein found in wheat, barley, and rye responsible for giving baked goods their structure and chewiness. So, the wrong move can completely destroy a recipe. But with the right ingredients, tools, and techniques in your arsenal, you can master gluten-free baking like a pro. Here are seven tips that can help you level up your gluten-free baking skills for the tastiest holiday season yet.
Note before baking: Remember that everyone’s gluten sensitivity or allergy is different, so if you’re baking for a gluten-free friend or family member, check in with the person to assess their needs. Some people need to be more careful about avoiding cross-contact (which is when gluten-free ingredients come into contact with gluten-containing ingredients during the cooking or baking process) than others. That means you may need to use a fresh stick of butter that hasn’t been used to butter regular toast and give your bakeware an extra thorough clean with a new sponge that’s never touched gluten-containing foods.
Stick to gluten-free recipes
You may think you can use any kind of gluten-free flour in place of regular wheat flour in a recipe (without making any other tweaks), but I’ve found you sometimes end up with dry, crumbly, dense, and/or gummy baked goods. Yuck! Instead, stick to gluten-free recipes—especially if you’re a beginner. These have been tested and designed to include the right ratio of ingredients and the right type of gluten-free flour, so your treats come out of the oven with a satisfying taste and texture—no tricky modifications required. Once you get more comfortable with gluten-free baking, you can start playing around with recipes.
Get familiar with gluten-free baking flours
There are a lot of gluten-free flours out there, so take time to familiarize yourself with what’s available. One-to-one blends are a popular option and can be used to create traditional baked goods, like cookies, cakes, pancakes, and biscuits. These blends usually contain a mix of flours (like white and brown rice) and starches (like tapioca), along with xanthan gum, which binds everything together and helps mimic the taste and texture of regular wheat flour. And while you can use one-to-one gluten-free flour in place of regular flour if you have a recipe you already love—you may need to make a few adjustments (such as the ones listed in this article) to account for the different properties of gluten-free flour.
There are also many single-ingredient gluten-free flours, including almond flour, coconut flour, and oat flour. These each have a unique taste and texture and shouldn’t be used in place of one-to-one blends. A good gluten-free recipe will take this into account and recommend the best flour or combination of flours to use. Always use the type of gluten-free flour listed on a recipe for the best results.
Weigh your flour
The best tip I’ve learned in my five-year gluten-free journey is to weigh gluten-free flour with a digital kitchen scale before baking. Because each gluten-free flour blend has a unique makeup of ingredients, some can be finer while others are coarser, it can greatly impact your final result. You wouldn’t want to scoop your gluten-free flour blend into a measuring cup and end up using more than the recipe actually calls for. Weighing your flour allows you to be much more precise. Most gluten-free recipes note weight measurements in the ingredients list.
Add extra moisture
Even if you follow a recipe exactly, gluten-free baked goods sometimes lack the moistness of traditional baking. You’ll know this if you try a recipe and it comes out dry or you notice the raw dough looks dry and crumbly before baking. This sometimes happens because gluten-free flour absorbs more moisture than standard wheat flour, so you may need to add some extra liquid to your batter. You can do this by incorporating a small amount (about two tablespoons) of milk, water, yogurt, applesauce, yogurt, or sour cream into the batter. Start with a tiny bit and gradually add more until you reach your desired consistency. But be careful: Adding too much extra liquid can lead to an unpleasant texture too.
Mix your batter, then mix it some more
In standard recipes, you often see warnings not to overmix your batter because it can make your cakes and cookies turn out gummy or tough. With gluten-free batter, though, it’s smart to stir, stir, and then stir some more. Gluten-free flour tends to be on the denser side and is prone to clumping. Mixing your batter for longer can help give your gluten-free baked goods more structure, make sure they rise correctly, and result in a lighter, fluffier texture.
Rest your dough
Once you’ve mixed your gluten-free batter, let it rest. This enables the batter to fully absorb all the liquid, so your baked goods come out with a soft, uniform texture—no dryness or grittiness here! This also helps the dough thicken and firm up so it’s easier to work with once you’re ready to shape it into whatever treat you’re making. In experience, covering and resting gluten-free batter for about a half hour yields good results.
Be mindful of baking time
Oven temperatures can vary—and every gluten-free flour has different characteristics—so, just like regular baking, your baked goods may need more or less time in the oven than what’s listed on the recipe to reach the perfect level of doneness. To help prevent undercooking or overcooking, I suggest using an oven thermometer to check the true temperature of your oven so you can adjust accordingly. I also pay close attention to the baking time and insert a toothpick in the center once I reach the minimum time listed in the recipe. If it comes out clean, then I know I’m good to go—no guessing needed!
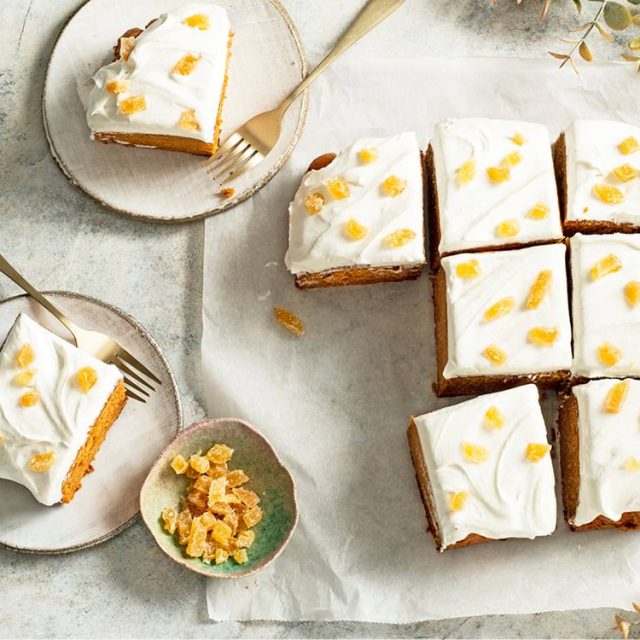
If you’re looking to try some easy gluten-free baking recipes, you can try Savory’s Gluten-Free Gingerbread Cake, Gluten-Free Snowballs, Chocolate-Almond Spice Cookies, Double-Chocolate Banana Bread, or the Gluten-Free Buttery Almond Cookies.
Christina Heiser is a New York City-based writer and editor living with celiac disease. She writes about food, fitness, beauty, and wellness and is also passionate about raising awareness around celiac disease as an ambassador for Beyond Celiac. When she’s not working, you can find Christina whipping up gluten-free versions of her favorite foods, traveling the world in search of the best gluten-free eats, and trying out the latest beauty and wellness trends.